15 ways to narrow your image search for the perfect photos
Think back to the last time you were scrolling through your Facebook feed or flipping through a magazine. What suddenly grabbed your attention and made you stop? It might have been an arresting headline. There’s an odd chance it could have been a block of text, but not likely. No, the reason you stopped scrolling is because you were confronted by a beautiful and engaging image.
Images make everything online more interesting, especially when it come to content. According to information compiled by MDG Advertising, content with compelling images averages 94 percent more total views than content without.
Having strong images in your content also encourages greater engagement on social media. Consider that Facebook bought Instagram for a whopping $1 billion dollars. It did this because it understands the importance of images—Facebook posts with photos have the highest percentage of engagement (0.37 percent) compared to posts with video (0.31 percent), or only text (0.27 percent). And those statistics were taken from before Facebook overhauled its timeline to be more image-heavy.
Finally, images can drive more traffic to your website through other search avenues, such as Google Images. After all, the more options a customer has for reaching your site, the more likely it is they’ll stumble across it while surfing.
Knowing just how important images are when it comes to supporting strong, engaging content, we’ve put together a handy post that will help your image search go as quickly and smoothly as possible.
Copyrights vs. license-free images
When it comes to finding beautiful images to accompany your online content, it’s not as easy as simply Googling something and clicking save. Most images online are the copyrighted property of artists, photographers, and brands and you’ll need a subscription to something like Getty Images to access them. Instead, what you need to look for are license-free images, also known as Creative Commons (CC) images. While these images might have different restrictions on exactly how you can use them, photographers have uploaded them with the intent that they be reused by writers and photographers around the world.
You have to know which images are free to use, where you can find them, and of course, how to find the best ones when you’re on a site. Here are just a few things to keep in mind when you begin your search.
Hunting down the best images
Know what you want. Using abstract words like “stress” and “anxiety” during your search won’t turn up strong images. Instead, think of a concept (like someone taking a deep breath or rubbing their neck) and search for that.
Think in the abstract. While abstract words might not do the trick, abstract concepts definitely do. Images that are slightly unusual or clever are more engaging for your readers, so try to think outside of the box when you’re deciding on an image. For example, if I’m writing a piece about crafting the perfect email subject line, I want to steer clear of vector images of inbox symbols. These are often cliché, overdone and, frankly, boring. Instead, I might search for “old-fashioned mailbox.” I ended up finding this:

Use related words. Sometimes the first word that pops into your head when you’re searching for an image isn’t actually the best one to use when searching for images. If you’re not finding the image you need with the word “sleeping,” search for related words like “sleep,” “nap, ” “rest,” “bed,” or “tired.”
Use advanced image search. Once you’re on an image sourcing website like Flickr, Pexels, Stocksnap.io, or Pixabay, you can use their “Advanced Search” option to narrow your search by color, texture, orientation, size, and whether or not a photo has people in it. Different sites will have different options. On Flickr, you can choose any of the following options when narrowing your search:
- Color
- Size
- Orientation
- Depth of field
- Pattern/minimalist styles
- Date taken
By knowing exactly what you’re looking for, using the right keywords, and narrowing your search using sites’ tools, you’ll be able to find the perfect photos for your story in no time.
Recognizing the good, the bad, and the ugly
Ok. You’ve got your concept nailed down and you’ve found a series of photos that could work for your article, but now you have to choose the best photo in the bunch to represent your idea.
In order for readers to understand the story you’re trying to tell with your images, you need to ensure that the photos are high-quality, editorial, and visually stunning. Although finding the perfect images takes a lot of practice, here are some things to keep in mind when choosing what to include.
In focus. The subject should be easily identifiable and in sharp focus. There’s nothing worse than finding a great picture, only to zoom in and realize that everything is blurry!
Large. Ensure photos are sized to at least 1000 pixels wide (but the bigger the better!).
Vibrant. Everyone loves color! Choose photos that are bright, happy, and vivid unless the client has stated otherwise.
Correctly exposed. The image should be nicely lit—not under- or over-exposed.
Candid and unique. Avoid anything that looks like a stock image or is too generic.
Editorial. Ask yourself: is this something I would see on the pages of a magazine? If not, ditch it.
Well composed. The subject should either be centered or positioned off-center according to the rule of thirds. You probably already know this rule if you use Instagram often (although you might not have recognized that you were using it).
The rule of thirds involves splitting an image into nine equal parts: visualize two vertical lines and two horizontal lines to evenly break up the picture. For the most visually arresting photo, your subject or subjects should land where any two lines cross. This generally makes for a more appealing picture all around.

Negative Space. This describes the amount of space between and around the objects in a photograph. You don’t want a photo to look cluttered. Instead, you want your reader to be able to focus on one part of the image. To accomplish this, make sure the object in your photograph has “breathing room”. Consider the above image, which immediately draws your eye to the tree.
Cohesive. All images in your article should look like they belong together. Consider color palette, style, filter, and vibrancy. Are all the images black and white? Grungy? Sepia-tone? Minimalist? Make sure they look like they are a part of the same set. Diversify the images’ content by including pictures of people, landscapes, and objects that are taken from different perspectives.
It’s time for a pop quiz
With all the information you’ve gained from this post, can you spot the good images from the bad? Remember to think about composition, image concept, and editorial appeal when deciding which image is the most suitable for an article. Let’s begin.
For the story “10 ways to destress,” we’ve decided to include a photo of a girl writing in her journal. Here are the two photos we have to choose from:

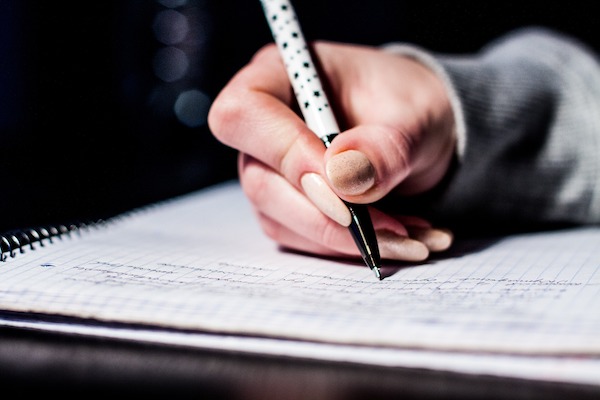
While both photos convey the idea of writing in a journal, the top photo is well lit and vibrant. The bottom photo, while conceptually correct, is a bit dark and is not as visually interesting—nor does it conjure up the feeling of relaxation or calm.
Ready to try again? When writing the story “6 simple ways to reduce your office’s paper consumption,” we thought a photo of shredded paper would make the most sense. Here are the two images we have to choose from:
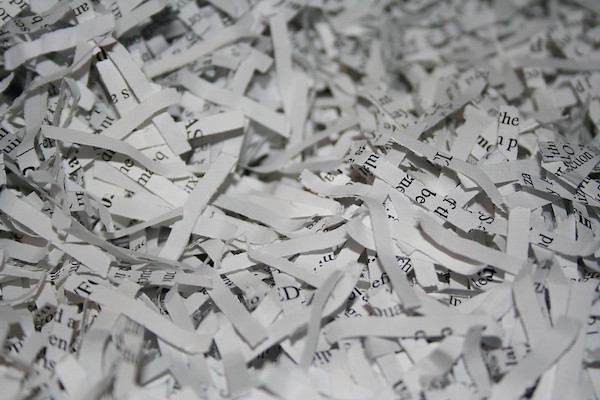

Which one is more visually dynamic and appealing? It’s clearly the bottom photo, no?
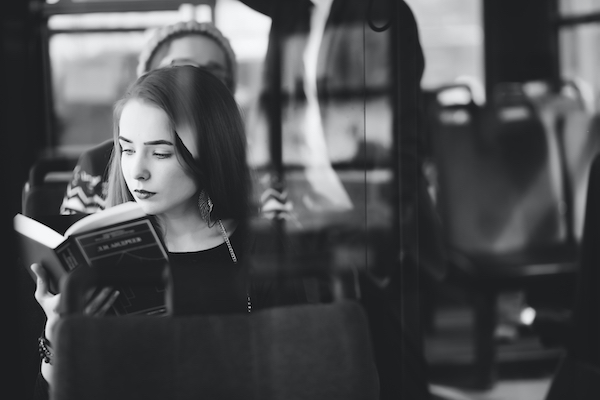
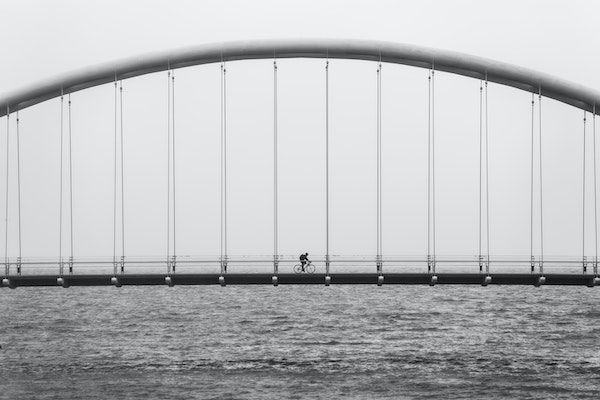
Ok, now you’re ready for the last test. For this, we’ve put together two sets of photos for an article titled “6 ways to relax on your morning commute.” Remember how we said that all photos in an article need to be cohesive (i.e. look like they’re from the same set)? Consider these two groupings (four photos each) and try to decide which one is the most visually appealing as a whole.
Set 1


Set 2


While both picture sets make sense with the article, only three of the pictures in Set 2 go well together. Which one is the odd one out? Although it’s subtle, the bus photo is over-exposed, stark, and has too much contrast—whereas the other three are softly lit and warm. Because of this, the bus photo distracts the eye and draws attention away from the rest of the piece. In Set 1, all photos are softly lit, warm, and provide a variety of images that each tell a different story about your morning commute to work.
If you’re struggling to find images that fit perfectly together, never fear! If the images have a CC license that allows you to remix and edit the material, you can make all of the images look cohesive through photo editing.
Does this feel like nitpicking? Maybe. Maybe not. If you pay close attention to what images you’re including in your articles and are conscientious of how they fit together to make a whole, you’ll put yourself a cut above the rest when it comes to producing a beautiful, cohesive final product.
So there you have it! Everything you need to know to find and select visually stunning photos to include in your blog posts. Consider these tips and tricks next time you begin sourcing images for your article and you can bet you’ll see a difference in the quality of work you’re producing.
Images: Bino Storyteller/Unsplash, Daria Nepriakhina/Unsplash, Alex Hockett/Unsplash, Carli Jean/Unsplash, tookapic/Pixabay, Mike Haw/Flickr, LoloStock/Shutterstock, Jon Ottosson/Unsplash, Roman Seliutin/Shutterstock, Matthew Wiebe/Unsplash, Zugr/Unsplash, Christian Spies/Unsplash, Chris/Flickr, Alejandro Lopez/Unsplash, Lou Levit/Unsplash